

how to add roms to recalbox
Today I'll take you through a step-by-step guide on how to install and use RecalBox on Raspberry Pi.
RecalBox is a free operating system where you can play retro games on your Raspberry Pi.
RecalBox is a free operating system for retro gaming, that can be installed on Raspberry Pi. To do this, download the image from the official website: recalbox.com, and flash it to a SD card with Balena Etcher. The game controller will be automatically configured and games are included.
In this tutorial, I'll show you:
- What is RecalBox, a short background about this software
- How to install RecalBox on Raspberry Pi
- The first steps you need to take to enjoy RecalBox (the controller configuration, downloading games, etc…)
I recommend following this tutorial with a Raspberry Pi 4 for better performances, with a decent controller (here is the one I use) and a fast and big SD card to store all your games (benchmark here).
Discover Recalbox
My favorite games!
Get a list of my 24 favorites games (with links) to play on Retropie, Recalbox or Lakka
What is RecalBox?
Recalbox is a free operating system that is dedicated to retro gaming.
It allows you to play old games on your Raspberry Pi.
Here is a short presentation video on the RecalBox system:
(the video is for the version 4.0, we are now at 6.0, so there have been changes since this video)
If you don't understand the differences with Retropie, you can click on the link to learn more about this.
I also have a video comparing the 4 main solutions for retro gaming, that can you can watch now.
Raspberry Pi Bootcamp
Sale: 10% off today.
Take it to the next level.
I'm here to help you get started on Raspberry Pi.
Learn all the skills you need in the correct order.
RecalBox features
RecalBox supports all the main gaming systems: NES/SNES, Game Boy, PSP, Megadrive, PlayStation, PC, Atari, etc.
So you can play games for all these platforms in one place, on your Raspberry Pi.
You can also use RecalBox as a media center solution, as it also includes Kodi.
Check my post about Kodi, if you don't know what it is.
Other features:
- Multi players (5 max)
- Rewind
- Screenshots
- Save state to continue your game later
- Wireless Controllers
But instead of talking about theory, let's see how it looks!
Download and install Recalbox
Download RecalBox
RecalBox is available for free on the official website.
Click on Download and then choose your current architecture from the list:

After a few minutes, you get the Recalbox image on your computer, then you can move to the next step.
Flash a RecalBox SD card
Next, you need to flash an SD card with the RecalBox image.
The procedure is the same for any system:
- If needed, download and install Etcher.
Etcher is a free tool to create SD card from an image. - Then start the Etcher tool.
- You'll get something like this:
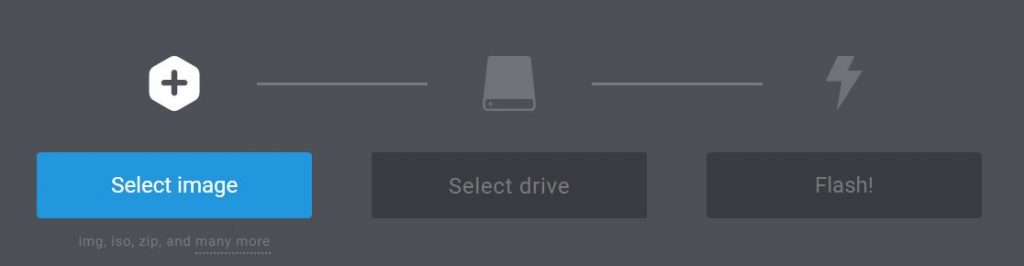
- Click on "Select image" and choose the recalbox.img file from your computer (probably in the Downloads folder).
- Then, insert your SD card into your computer and click on "Flash!".
- After a few minutes, your SD card will be ready to use.
First boot
- Insert the SD card in the Raspberry Pi slot.
- Start the Raspberry Pi.
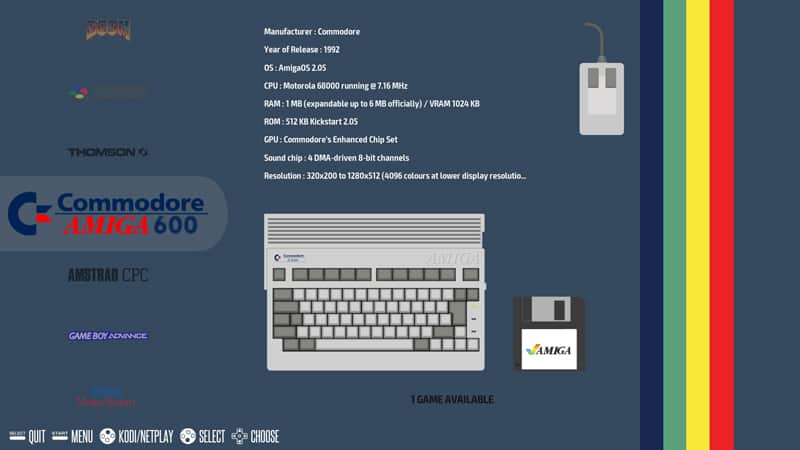
- You'll quickly see the main menu.
It looks like this:
You've done the installation process, and you can move to configuration.
Configure your Recalbox installation
Before playing your first game on RecalBox, there are a few things to configure in order to complete the system setup.
Master your Raspberry Pi in 30 days
Sale: 10% off today.
Download the eBook.
Uncover the secrets of the Raspberry Pi in a 30 days challenge.
Learn useful Linux skills and practice multiples projects.
Controller configuration
You will need a USB controller to use RecalBox (for the first controller).
If you don't have one, you'll find my favorites on my recommended product page.
- Plug your USB Controller in the Raspberry Pi.
- Press any key on the controller.
- A configuration screen will appear. It will prompt you to hold a button to start the configuration.
- Then, a configuration assistant opens, asking you the key to use for each action.
- Fill all of the key configuration lines you are able to.
With a basic controller, you might not have everything available.
You can skip some with the down arrow key or by holding one button. - Try to keep a button available for the hot key at the end.
If you want to use a wireless controller, you might be interested in this tutorial.
You can now move to the main menu and use your controller correctly.
Network configuration
Next you have to check the network configuration.
If you use an RJ45 cable with DHCP, there probably isn't anything to do.
But for wireless usage, you need to follow this procedure:
- Click on the "Start" button to open the configuration main menu.
- Scroll down to "Network settings" and click on it.
- A configuration menu like this will appear:
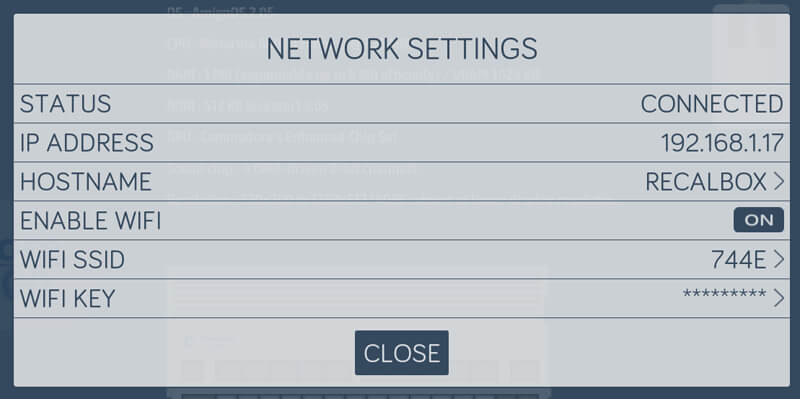
- Enable the Wi-Fi like on the screenshot.
- Then select your Wi-Fi SSID in the list.
- Finally, enter your Wi-Fi password and close the window to apply your changes.
- Come back to it to note your IP Address, you'll need it later.
Audio settings
RecalBox plays music in the menu. If you want sound in your games, you might need to configure the audio device to use and the volume level.
To do this, open the start menu and choose "Sound Settings".
In the new window, you can adjust the volume and force the output device to use.
Other settings
Basically, you'll find all settings in the start menu.
You can check every submenu to see if there's anything else you want to configure.
For example:
- Language and keyboard in System Settings.
- Autosave and shaders in Games Settings.
- Add a wireless controller in Controllers Settings.
- Overscan and over-clocking in Advanced Settings.
Master Python on Raspberry Pi
Sale: 10% off today.
Get the eBook.
Do more with your Raspberry Pi, learn the useful concepts and take the shortcuts.
You miss half of the fun of using a Raspberry Pi if you don't know anything about Python.
Update your system
The last thing I recommend you do before playing is update your system.
You probably already got an update pop-up after the network configuration.
- Open the start menu with "Start".
- Then go to "Updates".
- Click on "Start Update".
- Confirm with "Yes".
- If a new version is available, it will now download and install the files.
- At the end of the update, the system will automatically reboot and complete the upgrade.
Play games with Recalbox
Free games
RecalBox includes free games with the installation.
So you can play it immediately by choosing a game in the main menu.
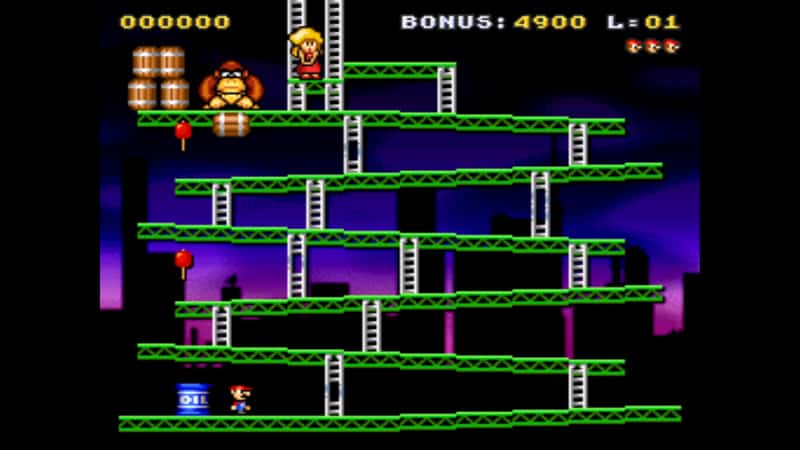
- Scroll to your favorite system, ex: Super Nintendo.
- Then choose a game in the list, ex: Classic Kong.
- And click on it to start the game.
- That's it!
But you aren't limited to the included games. You can also download and add new games.
This is what we'll discuss in the next section.
Download games
I already wrote an article on how to download games for Retropie.
You can follow the exact same procedure for RecalBox.
Let's take an example:
- Open RomHustler in your web browser.
- Click on Super Nintendo in the top menu.
- Scroll down to Street Fighter II Turbo and click on it.
- Click on "Click here to download this ROM".
- Wait a few seconds and click on the second link.
You have now a file called "Street Fighter II Turbo.7z" on your computer.
Let's learn how to upload it to RecalBox.
Install games
The easiest way to install new ROMs on RecalBox is to use the web interface:
- From your computer, open the web interface using: http://IP_ADDRESS.
If you didn't note it previously, the ip address can be found in the start menu > network settings.
In my case, I use http://192.168.1.17 - A page with RecalBox Manager opens.
- Click on ROMs in the left menu.
- Find "Super Nintendo Entertainment System" in the list and click on it.
- You'll get a page like this:
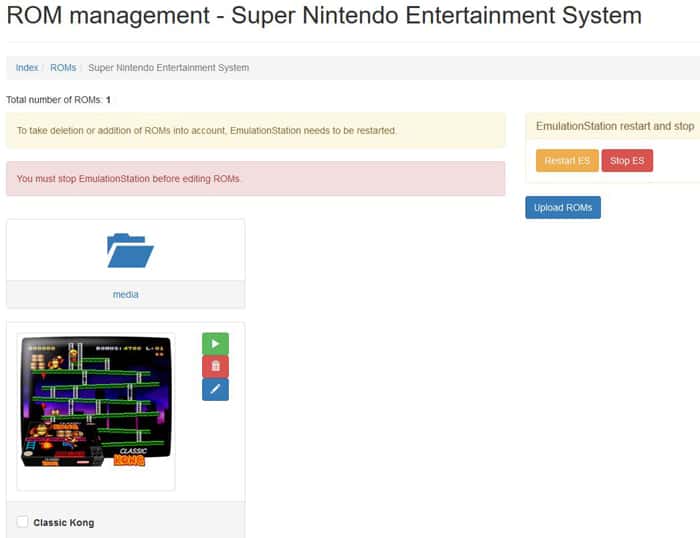
- Click on Upload ROMs (blue button).
- Browse to your Downloads folder and find the ROM we just downloaded.
- The game will appear next to Classic Kong in the game list.
- Finally, you need to Restart EmulStation (yellow button) to apply changes.
Note: you can also use the share at \\IP\share\roms to manage ROM files.
Play games
As soon as your interface is back on the Raspberry Pi, you can play your new game.
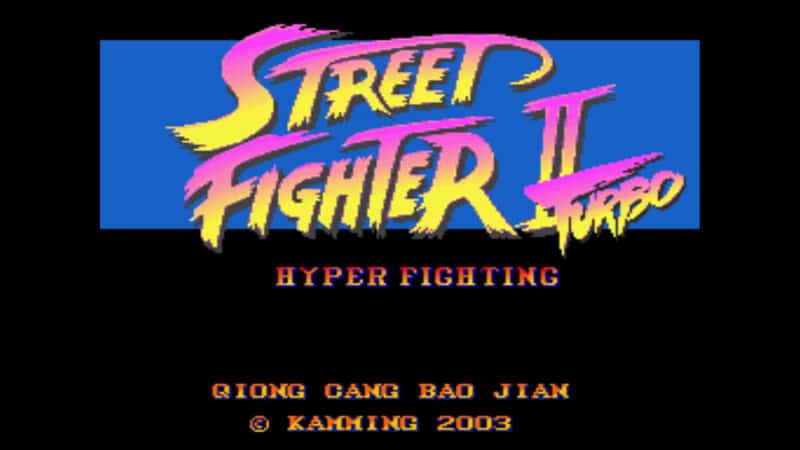
- From the main menu, scroll to Super Nintendo.
- Select "Street Fighter II Turbo" in the game list and click on it.
- The game will start:
Video
If you want to see a summary of the steps to install Recalbox on your Raspberry Pi, you can watch this video:
And you can subscribe here to receive the new videos about Raspberry Pi.
Related Questions
Get My Cheat Sheet!
Grab your free PDF file with all the commands you need to know on Raspberry Pi!
Why isn't there a picture for new games in the interface? To get pictures, reviews and descriptions for new games you install, you need to run the scraper process. In the start menu, choose "Scraper" then "Scrape Now". If the tool finds the information, it will add it for your new games.
How to use Kodi from the RecalBox interface? Click on Start and select "Kodi Media Center". You'll be taken directly to Kodi. Then, to get back to EmulStation, click on the Power icon on the top and choose Exit. Kodi is a powerful media center software, you can read my guide here about it.
Where to get more information about RecalBox? If you need to go further, you'll find the official documentation here on GitHub. It's available in 6 languages and covers all the main features. There is also a forum on the official website, you can use it to ask specific questions.
Support us: Join the community on Patreon to show your support, get behind-the-scenes content and other awesome perks!
Conclusion
That's it, you now know everything you need to get started with RecalBox on Raspberry Pi.
It's an easy-to-use retro gaming system, with everything ready for you to enjoy gaming sessions.
I find it easier for beginners than Retropie, as it already includes everything in the EmulStation start menu.
There is no need to go in sub-sub-menus to enable something important.
If you like retro gaming with Raspberry Pi, I have a few articles available.
Feel free to check them to find your favorite gaming platform:
- Retropie beginner's guide
- Nostalgic retro games
- Use PS4 controller on Retropie
- Where to download ROMs for Retropie
- Lakka tutorial
how to add roms to recalbox
Source: https://raspberrytips.com/recalbox-beginner-guide/
Posted by: sebringlour1993.blogspot.com
0 Response to "how to add roms to recalbox"
Post a Comment